


Let’s be honest—there’s nothing worse than your favorite pair of sneakers looking dingy just when the rest of your outfit is on point. But what if cleaning your shoes didn’t feel like a chore? Knowing how to clean your sneakers the right way doesn’t just keep them looking fresh—it extends their life and helps you get the most out of your investment.
While many people assume sneakers are meant to get dirty, the truth is that clean shoes make a statement. They reflect your attention to detail, and in a world where first impressions count, that matters more than you’d think.
Can You Use a Washing Machine?
It’s one of the most debated questions in sneaker care. The answer depends on the material. Sneakers made from canvas, nylon, cotton, or polyester typically hold up well in a gentle machine wash. However, for leather, suede, or specialty fabrics, skip the spin cycle and opt for hand-cleaning instead.
Sneaker Cleaning Essentials
Before getting started, gather your supplies:
- An old toothbrush or a soft-bristle brush
- Mild laundry detergent
- Microfiber cloths or old t-shirts
- A mesh laundry bag
- Baking soda and white vinegar
- A suede or leather cleaner (if needed)
Step-by-Step Sneaker Cleaning Guide
1. Remove Laces and Insoles
Start by taking off the laces and insoles. Wash the laces separately or replace them if they’re too worn. Sprinkle some baking soda on the insoles to absorb odors before gently scrubbing them with a mix of warm water and detergent.
2. Scrub the Soles
Use a toothbrush and a baking soda paste (with a splash of vinegar, if needed) to scrub the soles. This lifts away caked-on dirt and restores some of that original grip and shine. Let the paste sit for a minute or two for stubborn grime.
3. Machine Washing the Uppers
If your sneakers are washer-safe, place them in a mesh laundry bag with a towel or two to prevent damage during the cycle. Use cold water, a small amount of detergent, and a gentle cycle. Avoid heavy spin settings and never use bleach—it can discolor the material.
4. Air Dry, Always
Resist the temptation to use the dryer. Instead, reshape your shoes using towels or newspaper and let them air dry at room temperature. High heat can warp your shoes or damage glue and stitching.
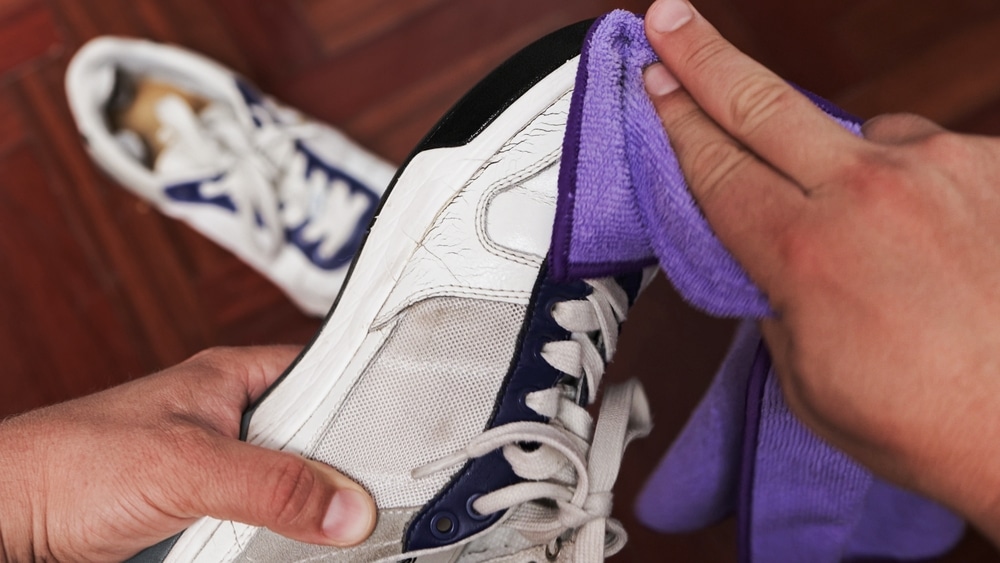
Hand-Cleaning Tips for Delicate Materials
For leather and suede sneakers, avoid the washer completely. Use material-specific products such as:
- Leather: Saddle soap and a soft cloth, followed by a leather conditioner.
- Suede: A suede brush or suede eraser to gently lift dirt without damaging the texture.
- Rubber: A simple soap and water mix works well—just don’t forget to dry thoroughly afterward.
If you’re cleaning white leather or canvas shoes, a diluted mix of white vinegar and baking soda can work wonders. Just don’t oversaturate—gentle is the name of the game.
A Small Routine, Big Impact
Sneaker maintenance might feel tedious at first, but like flossing or oil changes, it pays off with consistency. Not only will your kicks look better, but they’ll also last longer and perform better.
And here’s something you might not hear on most cleaning guides: don’t forget to rotate your sneakers. Giving each pair a break not only prolongs their life but gives your feet and soles time to recover too.
Image Source: WD Stock Photos / Shutterstock